
Recipe for Mexican Ceviche with Lime and Fresh Cilantro


Mexican ceviche, often referred to in Spanish-speaking coastal regions as ceviche, is a refreshing dish consisting of fresh raw seafood "cooked" in the acidity of citrus juices. Unlike cooked seafood dishes that rely on heat, ceviche utilizes a chemical process where the citric acid denatures the proteins in the fish, changing its texture from translucent and soft to opaque and firm. This dish is a staple of Mexican coastal cuisine, particularly in states like Sinaloa and Nayarit, where the abundance of fresh seafood dictates the menu. For the American home cook, Mexican ceviche serves as an ideal centerpiece for summer gatherings, outdoor dining, or a light, high-protein lunch.
The beauty of a well-executed Mexican ceviche lies in its simplicity and its reliance on the quality of a few key ingredients: fresh fish, bright lime juice, sharp onions, and aromatic cilantro. This recipe focuses on a traditional preparation that highlights these clean flavors without the need for complex cooking techniques. While many variations exist across Latin America—some incorporating heavy tomato bases or even cooked shrimp—this version stays true to the vibrant, citrus-forward style that defines much of the Mexican coastal experience. By following this guide, you will learn how to select the right fish, how to manage the "cooking" time to achieve the perfect texture, and how to balance the acidity so the dish remains bright rather than overwhelming.
Selecting and Preparing Your Seafood

The most critical component of any ceviche is the seafood. Because the fish is not subjected to high heat, you must prioritize freshness and food safety. When shopping at a US supermarket, look for fish that has a mild, clean scent—it should smell like the ocean, not "fishy." If the seafood has a strong or ammonia-like odor, do not use it for ceviche. Always ask your fishmonger about the origin of the catch and ensure the seafood has been handled and stored at proper temperatures.
For this recipe, white-fleshed fish is the preferred choice. Highly recommended varieties available in most US grocery stores include sea bass, snapper, halibut, or mahi-mahi. These fishes have a firm texture that holds up well to the acidity of the lime juice. If you cannot find these, cod or even sea bream can work, provided they are incredibly fresh. While shrimp is a very popular addition to Mexican ceviche, if you choose to use it, you must either blanch the shrimp in boiling water for 60 to 90 seconds first or ensure it is high-quality, sushi-grade shrimp that you are comfortable consuming partially raw. For this specific recipe, we will focus on a pure white fish preparation to master the foundational technique.
Once you have selected your fish, prepare it by slicing it into uniform pieces, approximately 1/2 inch cubes. Uniformity is not just about aesthetics; it ensures that every piece of fish "cooks" at the same rate in the lime juice. After cubing, rinse the fish in very cold water and pat it dry with paper towels. This helps remove any excess moisture or surface impurities, ensuring the lime juice can penetrate the flesh effectively.
Ingredients for Mexican Ceviche
The following ingredient list is scaled to yield approximately 4 servings. All measurements are provided in US customary units.
- 1 pound (454 g) fresh white fish (such as sea bass, snapper, or halibut), cut into 1/2-inch cubes
- 1/2 to 3/4 cup (120–180 ml) freshly squeezed lime juice (approximately 6 to 8 juicy limes)
- 1/2 cup (about 1 medium) red onion, very finely diced
- 1 large Persian cucumber or 1/2 a standard English cucumber, finely diced
- 1 large Roma tomato, seeded and finely diced
- 1/2 cup (about 1/2 bunch) fresh cilantro, finely chopped
- 1 serrano pepper or jalapeño, minced (remove seeds for a milder flavor)
- 1/2 teaspoon fine sea salt, or more to taste
- 1/4 teaspoon freshly cracked black pepper
- Optional: 1 ripe avocado, diced, for garnishing
Note on limes: Always use fresh lime juice rather than bottled juice. Bottled lime juice often contains preservatives and lacks the bright, volatile oils found in the zest and fresh pulp, which are essential for the "zing" of a traditional ceviche.
Step-by-Step Preparation
Preparing ceviche requires patience and attention to timing. The goal is to reach a state where the fish is opaque throughout but still retains a succulent, tender bite.
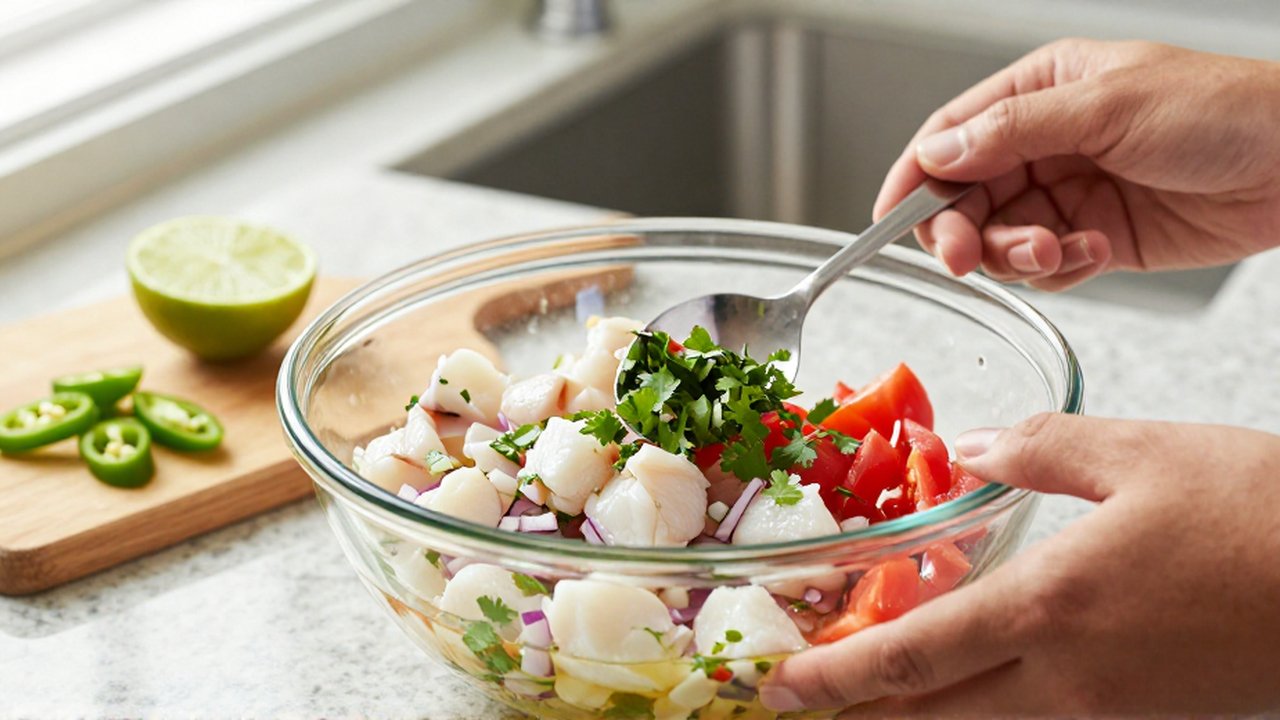
- Prepare the Aromatics: In a medium-sized glass or stainless steel mixing bowl, combine the finely diced red onion, minced serrano pepper, and diced cucumber. If you prefer a less pungent onion flavor, you can soak the diced red onions in cold water for 10 minutes, then drain and pat dry before adding them to the bowl.
- Marinate the Fish: Place the cubed fish into the bowl with the aromatics. Pour the freshly squeezed lime juice over the fish until the cubes are completely submerged. Use a spoon to ensure the fish is evenly distributed.
- The "Cooking" Process: Cover the bowl with plastic wrap and place it in the refrigerator. Let the fish marinate for anywhere from 20 to 40 minutes. At the 20-minute mark, check a piece of fish; it should be turning white and opaque. Do not leave it for more than an hour, or the acid will continue to break down the proteins until the fish becomes mushy or "chalky."
- Incorporate the Fresh Elements: Once the fish has reached your desired firmness, add the diced tomatoes and the chopped cilantro to the bowl. Add the salt and black pepper.
- Final Toss and Seasoning: Gently fold the ingredients together so you don't break the fish pieces. Taste the liquid (the leche de tigre or "tiger's milk") and add more salt or lime juice if necessary.
- Garnish and Serve: Transfer the ceviche to individual serving bowls or a large platter. If using avocado, add the diced pieces at the very last moment to prevent them from browning or getting mashed into the mixture.
Serving Suggestions and Storage
Mexican ceviche is most traditionally served chilled. To elevate the presentation and balance the acidity, serve it alongside crispy corn tortilla chips (totopos), which provide a necessary crunchy texture to contrast the soft fish. You may also serve it on top of crispy tostadas—large, flat, fried corn tortillas—to create a more substantial handheld snack. For a complete meal, it pairs beautifully with a side of seasoned rice or simply enjoyed as a light appetizer during warm weather.
Regarding storage, ceviche is best enjoyed immediately after the marination process is complete. Because the fish is essentially raw, it does not store well for long periods. If you have leftovers, they must be kept in an airtight container in the refrigerator and consumed within 24 hours. However, please be aware that the texture will continue to change as it sits in the acidic liquid, eventually becoming overcooked. For the best experience, prepare the fish and lime base, and then add the vegetables and cilantro just before you are ready to eat.
Frequently Asked Questions

Can I use frozen fish for ceviche?
While you can use fish that was previously frozen, it must be thawed completely in the refrigerator before you begin. Quick-thawing methods, like placing fish in warm water, can compromise the texture and safety of the seafood. For the best results, high-quality fresh fish is always the preferred choice for the delicate texture required in ceviche.
How do I make the dish less spicy?
The heat in this recipe comes primarily from the serrano or jalapeño pepper. To reduce the heat, remove all the seeds and the white internal membranes (the pith) from the pepper before mincing it. The seeds hold most of the capsaicin. If you prefer an extremely mild version, you can omit the pepper entirely and add a small amount of bell pepper for color and crunch.
What if my lime juice is too sour?
The acidity is central to the dish, but if it feels overly sharp, a tiny pinch of sugar or a very small amount of additional salt can help balance the flavors. However, avoid adding too much, as you want to maintain the bright, refreshing profile that characterizes Mexican coastal cuisine.
Leave a Reply
Related posts