
Creamy Venezuelan Arepas Recipe Using Corn Flour Guide


Arepas are the quintessential staple of Venezuelan cuisine, serving as a versatile, corn-based bread that functions as a vessel for almost any filling. While many associate Latin American breads with wheat or yeast, the arepa is distinct because it is made from pre-cooked corn flour, resulting in a texture that is crispy on the outside and soft, almost creamy, on the inside. For the American home cook, mastering the arepa is a gateway to a pantry staple that is incredibly efficient for breakfast, lunch, or dinner.
This guide focuses on creating a "creamy" version of the traditional Venezuelan arepa. In this context, creaminess does not refer to adding dairy to the dough itself, but rather achieving a specific level of hydration and technique that ensures the interior remains moist and tender, preventing the common pitfall of the arepa becoming hard or dry once cooled. By using standardized US measurements and ingredients readily available in most American grocery stores, you can recreate this comforting side dish or main component with confidence. We will cover the essential ingredients, the specific kneading technique required for the perfect texture, and the cooking methods that ensure a golden, even crust.
Essential Ingredients and Substitutions
To make authentic Venezuelan arepas, the most important ingredient is pre-cooked corn flour. This is not the same as cornmeal used for cornbread or polenta, which is gritty and requires long cooking times. You are looking for a product specifically labeled as "pre-cooked corn flour" (harina precocida). In the United States, the most recognizable brand is P.A.N., which is found in the international aisle of most major supermarkets or at local Latin markets. This flour is specially processed so that it hydrates instantly when mixed with water, creating a dough that is easy to handle.
The base recipe requires very few ingredients, which is why the quality of each one matters. You will need:
- 2 cups (approx. 16 oz / 450 g) of pre-cooked white or yellow corn flour.
- 2 ½ cups (20 fl oz / 600 ml) of warm water. While room temperature water works, warm water helps the starch hydrate more smoothly.
- 1 teaspoon of fine sea salt.
- 1 tablespoon of unsalted butter or vegetable oil (optional, for a richer, smoother dough).
If you cannot find pre-cooked corn flour, there is no direct substitute that will yield a traditional arepa. Using regular cornmeal will result in a texture that is too crumbly and tough. However, if you find yourself in a situation where you cannot access a Latin market, check the gluten-free section of your supermarket, as these brands often carry the necessary pre-cooked corn products.
For the fillings, which turn these sides into meals, the Venezuelan style often involves "reina pepiada" (a chicken and avocado salad) or "pelúa" (shredded beef with cheese). To keep these arepas creamy on the inside, you might also consider adding a small amount of melted butter or a touch of heavy cream to the dough during the kneading process, though the traditional method relies primarily on the water-to-flour ratio.
Step-by-Step Guide to Perfect Dough
The secret to the creamy texture lies in the hydration and the rest period. If you rush the process, you will end up with small cracks in the dough and a gritty mouthfeel. Follow these steps carefully to ensure success.

- Prepare the Liquid Base: In a large mixing bowl, combine the warm water and the salt. If you are using butter or oil to add richness to the dough, melt it into the warm water now. Stir the water until the salt is fully dissolved.
- Incorporate the Flour: Gradually add the pre-cooked corn flour to the water. Do not dump it all in at once; instead, add it in stages, stirring with your hand or a sturdy spoon. This prevents large, dry clumps of flour from forming at the bottom of the bowl.
- The Kneading Process: Once the flour is mostly incorporated, use your hands to knead the dough. You are looking for a consistency that is soft and pliable, similar to playdough. If the dough feels too dry or shows cracks when you press it, add water one tablespoon at a time. If it feels too sticky to handle, add a sprinkle of corn flour.
- The Essential Rest: This is the most important step for a creamy interior. Once the dough is smooth, cover the bowl with a damp kitchen towel and let it sit for at least 5 to 10 minutes. This allows the corn particles to fully absorb the moisture, which eliminates grit and creates that sought-after tenderness.
- Shaping the Arepas: Divide the dough into equal portions, roughly the size of a large lemon or a small orange. Roll the portion between your palms to form a smooth ball, then gently flatten it between your palms to create a disk about ½ inch to ¾ inch thick. The edges should be smooth; if you see cracks, moisten your hands with water and smooth them out.
Cooking Methods for a Golden Crust
Once your disks are shaped, you need to cook them to develop a structural crust that allows the arepa to be sliced open without falling apart. There are two primary ways to do this in a home kitchen: the stovetop method for maximum flavor, or the oven method for convenience.
The Stovetop Method (Preferred):
Heat a cast-iron skillet or a non-stick pan over medium heat. Lightly coat the pan with a teaspoon of oil. Place the arepas in the pan and cook for about 5 to 7 minutes per side. You are looking for a deep golden-brown color and a slight "crustiness." Periodically press down lightly on the arepa with a spatula to ensure even heat distribution. To ensure the inside is cooked through and steaming, you can finish them in a preheated oven at 350°F (175°C) for about 5 minutes after the stovetop searing is done.
The Oven Method:
If you are making a large batch, preheat your oven to 400°F (200°C). Place the arepas on a baking sheet lined with parchment paper. Bake for approximately 20 to 25 minutes, turning them halfway through. While this is easier for crowds, the texture may be slightly less "crunchy" than the stovetop version.
To check if they are done, gently tap the surface of the arepa with your finger. It should sound slightly hollow, and there should be no soft, doughy spots remaining on the surface.
Serving and Storage Practicalities
The beauty of the arepa is its utility. Once cooked, you can slice them open horizontally—not all the way through—to create a pocket. This is the traditional way to serve them filled with cheese, black beans (caraotas negras), or various meats. For a quick breakfast, simply split them and spread salted butter or cream cheese inside while they are still hot.
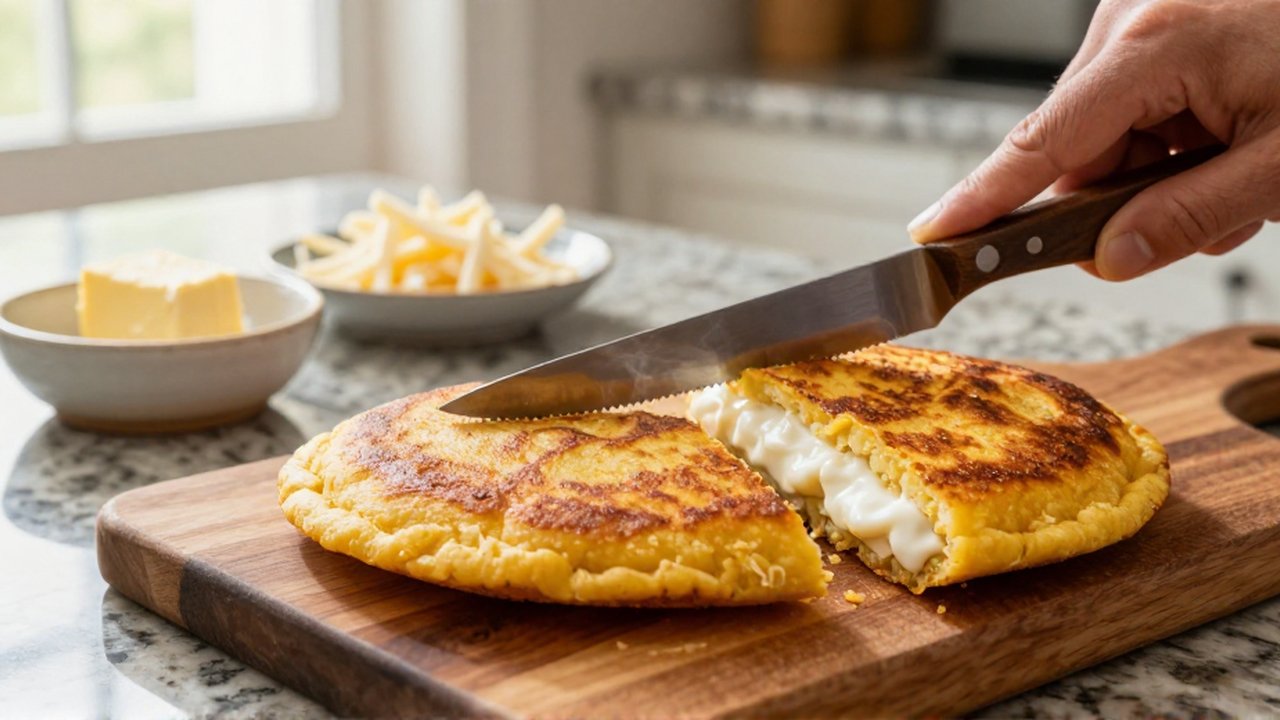
If you have leftovers, they can be stored in an airtight container at room temperature for up to one day, or in the refrigerator for up to three days. However, arepas tend to lose their moisture when refrigerated. To revive them, do not use the microwave, as this will make them rubbery. Instead, reheat them in a dry pan over medium heat or in a toaster oven until the exterior regains its crispness. This will bring back the contrast between the shell and the creamy center.
When handling raw ingredients like meats or avocados for fillings, always follow standard food safety practices, such as washing produce thoroughly and ensuring all proteins are cooked to the recommended internal temperatures. For a safer and more seamless experience, many home cooks prepare their fillings in advance and store them separately from the arepas to maintain the integrity of both components.
Frequently Asked Questions
Why are my arepas cracking so much?
Cracking is almost always a sign of insufficient hydration. The dough needs more water, or more importantly, it needs more time to rest. If the dough is too dry, the surface tension becomes too high during shaping, leading to cracks. Always ensure the dough is as smooth as possible before shaping and let it rest to allow the starch to fully hydrate.

Can I use regular cornmeal instead of pre-cooked corn flour?
It is not recommended. Regular cornmeal (like that used for grits or polenta) lacks the specialized pre-cooking process that allows for instant hydration. Using it will result in a texture that is grainy, crumbly, and difficult to shape into a disk. If you must use it, you would need to cook it with liquid on the stove first to create a "masala" or porridge before attempting to shape the arepas, but the result will not be an authentic Venezuelan arepa.
Can I make the dough ahead of time?
Yes, you can make the dough a few hours in advance. Keep it covered with a damp cloth or plastic wrap to prevent a skin from forming on the surface. However, for the best "creamy" results, it is best to shape and cook them shortly after the initial resting period.
Leave a Reply
Related posts