
Brazilian Pão de Queijo Cheese Bread Recipe with Corn

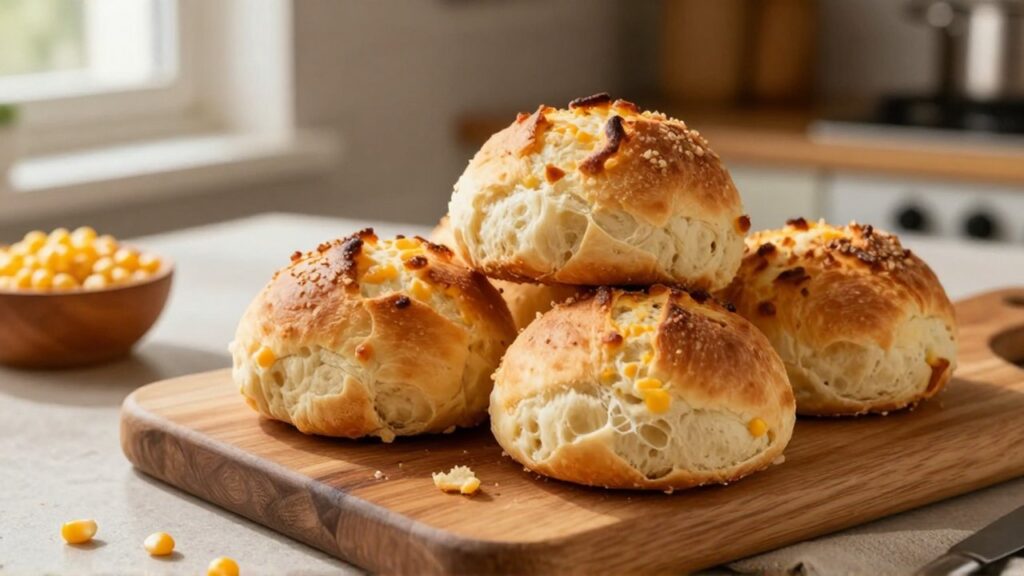
Pão de queijo, a traditional Brazilian cheese bread, is a beloved staple of South American snack culture. Characterized by a unique, chewy, and slightly elastic texture, these bite-sized rolls are traditionally made using tapioca starch, which provides a gluten-free structure that behaves very differently from wheat-based breads. While the classic version is already a favorite for breakfast or afternoon snacks, adding corn to the mix—creating a version often referred to as pão de queijo com milho—adds a subtle sweetness and a beautiful golden hue that complements the savory saltiness of the cheese.
For the American home cook, mastering pão de queijo is an excellent way to introduce international textures to the kitchen without needing specialized equipment. While the ingredient list might look unconventional at first, all the components, including the specialized starch, are readily available in most well-stocked US supermarkets or through common online retailers. This recipe is designed to bridge the gap between traditional Brazilian techniques and the practicalities of a US kitchen, ensuring you achieve that signature crispy exterior and molten, airy interior even if you are making them for the first time.
Understanding the Ingredients and Substitutions
The soul of pão de queijo lies in the starch. In Brazil, polvilho doce (sweet tapioca starch) or polvilho azedo (sour tapioca starch) are used. For this recipe, we focus on sweet tapioca starch, which yields a milder flavor and a more tender crumb. If you cannot find "tapioca starch" or "tapioca flour" in the baking aisle, check the gluten-free section; they are the same product. It is vital not to substitute this with wheat flour or cornstarch, as the chemical reaction during baking is what creates the iconic hollow, chewy center. The corn element in this version comes from finely milled cornmeal or canned sweet corn, which adds moisture and a rustic flavor profile.
Cheese selection is equally critical. Traditionally, a hard, aged cheese like Queijo Minas is used. In the United States, the best way to replicate this profile is by using a combination of cheeses. A sharp white cheddar provides the necessary saltiness and "bite," while a Monterey Jack or mild Gruyère offers the melting quality required for the center. Avoid pre-shredded cheeses if possible; they are coated in cellulose (an anti-clumping agent) that can prevent the dough from binding properly and may result in a grainy texture. Grating your own cheese ensures a smooth, cohesive dough.
Ingredients for Pão de Queijo with Corn
This recipe yields approximately 30 to 36 small cheese bread rolls.

- 2 cups (approx. 10 ounces / 285g) sweet tapioca starch
- 1/2 cup (4 ounces / 115g) fine cornmeal (not cornmeal used for gritty polenta, but a fine texture)
- 1 1/2 cups (6 ounces / 170g) finely shredded sharp white cheddar cheese
- 1/2 cup (4 ounces / 115g) finely shredded Monterey Jack or Mozzarella cheese
- 1/2 cup (4 ounces / 115g) canned sweet corn, very finely minced or pureed
- 2 large eggs, at room temperature
- 1/2 cup (4 ounces / 118ml) whole milk
- 1/4 cup (2 ounces / 56g) unsalted butter, softened
- 1/2 teaspoon fine sea salt (adjust based on the saltiness of your cheese)
- 1/4 teaspoon baking powder (optional, for a slightly more lifted roll)
Step-by-Step Preparation Guide
- Prepare the Base: In a large mixing bowl, whisk together the tapioca starch, fine cornmeal, salt, and baking powder. Ensure there are no large lumps in the cornmeal.
- Scald the Liquids: In a small saucepan over medium heat, combine the milk and the butter. Heat the mixture until the butter is completely melted and the milk just begins to simmer (do not let it reach a rolling boil). This process, known as "scalding" the starch, is a traditional technique that helps gelatinize the starch, creating the dough's unique elasticity.
- Combine Hot and Dry: Pour the hot milk and butter mixture into the bowl containing the starch and cornmeal. Stir vigorously with a sturdy wooden spoon. The mixture will look quite wet and may seem lumpy at this stage. Cover the bowl and let it rest for about 5 to 10 minutes. This allows the starch to fully absorb the liquid.
- Incorporate Eggs and Corn: Add the eggs one at a time to the cooled (but still warm) dough, mixing thoroughly after each addition. Once the eggs are incorporated, fold in the finely minced corn. The corn should be very small so that it doesn't break the structure of the dough.
- Add the Cheese: Fold in the shredded white cheddar and Monterey Jack. The dough should be tacky and soft, somewhat similar to a very thick cookie dough or a heavy bread dough, but it will be much stickier than traditional wheat dough. If it is too wet to handle, add a tablespoon of tapioca starch at a time, but be careful not to overwork it.
- Shape the Rolls: Preheat your oven to 375°F (190°C). Line a large baking sheet with parchment paper. Using your hands or two small spoons, scoop about 1 to 1.5 tablespoons of dough and roll them into smooth balls. Place them on the baking sheet, leaving at least 2 inches of space between each roll, as they will expand during baking.
- Bake: Bake for 15 to 20 minutes, or until the rolls are puffed up and the bottoms are lightly golden. The tops should also show a hint of color, but they should not become dark or hard. They are best served immediately while the centers are still soft and stretchy.
Tips for Perfect Results and Storage
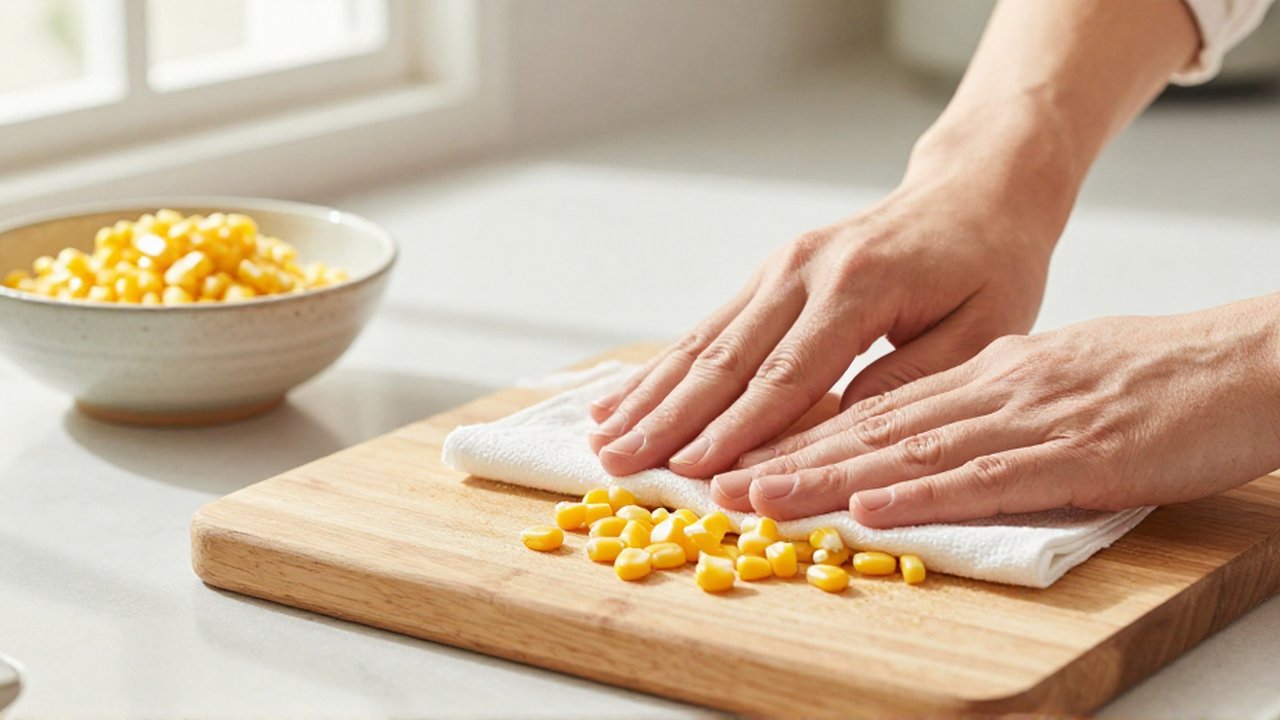
One of the most common mistakes when making pão de queijo is overbaking. Because of the high starch and moisture content, if you leave them in the oven too long, they will lose their signature chewiness and turn into hard, crunchy balls. Aim for a golden exterior that still feels slightly soft to the touch. Additionally, ensure your corn is as dry as possible; if using canned corn, pat it very dry with paper towels before mincing to prevent the dough from becoming too runny.
If you have leftovers, these rolls are best stored in an airtight container at room temperature for no more than one day. For longer storage, you can freeze them. To freeze, place the unbaked dough balls on a tray in the freezer until solid, then transfer them to a freezer bag. When you are ready to eat, bake them directly from the freezer, adding an extra 5 to 7 minutes to the baking time. Reheating a baked roll in a toaster oven or microwave for a few seconds can help restore that "fresh from the oven" molten texture.
Frequently Asked Questions
Can I make this recipe vegan or dairy-free?
While it is possible to substitute the milk with a plant-based alternative and the cheese with vegan shreds, the texture of pão de queijo relies heavily on the proteins and fats found in real cheese and eggs. A vegan version will likely be more crumbly and less "stretchy" than the traditional version. To achieve the best results, use a high-fat vegan cheese and ensure your plant milk is unsweetened.
Why is my dough so sticky?
Sticky dough is completely normal for pão de queijo. Because there is no gluten to create a structure, the dough is held together by the gelatinized starch. Do not be tempted to add massive amounts of flour to "fix" the stickiness, as this will change the fundamental identity of the dish into a standard biscuit. Using parchment paper or lightly greasing your hands with oil can make shaping much easier.
What is the difference between sweet and sour tapioca starch?
In this recipe, we use sweet starch (polvilho doce), which provides a more uniform, chewy texture. Sour starch (polvilho azedo) has a more fermented, acidic flavor and causes the bread to puff up more significantly, creating larger air pockets. If you choose to use sour starch, you may find the rolls are more hollow and have a more pronounced tang.
Leave a Reply
Related posts